Tag Action Links
Let subscribers add or remove tags by clicking a link in your email
Tag action links let subscribers update their preferences with one click. Use them to capture interests, opt out of a topic, or start a workflow, without a login.
Before you use Add tag: Clicking an add-tag link also resubscribes an unsubscribed subscriber. There is no confirmation step; the click applies the action immediately.
Insert In The Editor
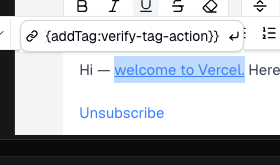
Tag action links work in campaigns and workflow emails, not transactional emails. Put the variable in the URL field of a link or button, never in the subject line or as plain body text.
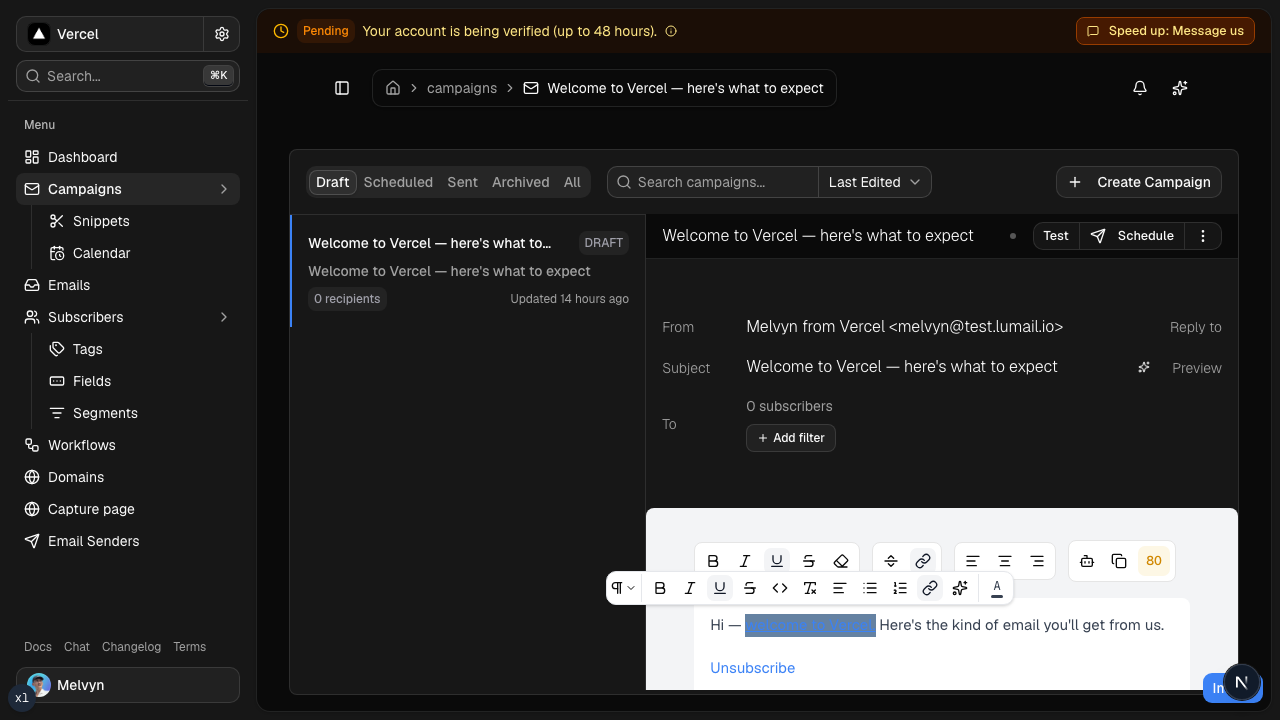
- Select the text you want to turn into a link, or select a button
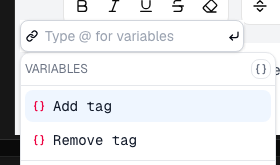
- Open the link field with the link icon or
Cmd+K - In the URL input, type
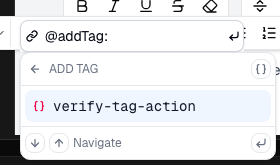
@to open the variable menu - Select Add tag or Remove tag, or keep typing:
@addTag/@removeTagopens the tag submenu@vipsurfaces matching add/remove actions for that tag
- Choose an existing tag, or type a new tag name and press Enter
You can insert a tag that does not exist yet. Add tag creates it on the first click. Remove tag is a no-op until that tag exists on the subscriber.
See the editor walkthrough
Syntax
Use one of these variables as the complete URL. Separate multiple tag names with commas.
| Action | URL to paste |
|---|---|
| Add a tag | {{addTag:vip}} |
| Remove a tag | {{removeTag:promo}} |
| Add multiple tags | {{addTag:vip,early-access}} |
| Remove multiple tags | {{removeTag:promo,newsletter}} |
Do not add https://. Lumail generates a complete subscriber-specific URL when it sends the email.
Examples
Interest capture
Want more content about AI? [Get AI updates]({{addTag:interested-ai}})
The link text is the promise. The URL is only {{addTag:interested-ai}}.
Soft opt-out
Leave one topic without a full unsubscribe:
[Stop promotional emails]({{removeTag:promo}})
Multiple tags at once
[Join the VIP list]({{addTag:vip,early-access}})
HTML
If you are writing HTML (API, snippet, or custom block), put the variable in href only:
<a href="{{addTag:interested-ai}}">Get AI updates</a>
<a href="{{removeTag:promo}}">Stop promotional emails</a>
<a href="{{addTag:vip,early-access}}">Join the VIP list</a>
Preference center in the email
Put choices directly in the email instead of a separate settings page:
Keep weekly tips: [Yes, keep them]({{addTag:weekly-tips}})
Leave the promo stream: [Unsubscribe from promos]({{removeTag:promo}})
Workflow trigger
Use a click as the entry signal for a sequence:
- Subscriber clicks
{{addTag:interested}} - A workflow starts when that tag is added
- The follow-up sequence begins automatically
See Workflows and Action Step for tag-based automation.
How It Works
- You use a tag action variable as the URL of a link or button
- When the email is sent, Lumail replaces it with a unique per-subscriber URL
- On click, tags are applied immediately
- The subscriber lands on a success page with the requested tags shown as badges
What The Subscriber Sees
After the click, the subscriber sees a success page that:
- Uses your organization branding
- Confirms the action completed
- Shows the tags requested by the link as badges
Constraints
- Add tag creates a tag on the first click if it does not exist, and resubscribes an unsubscribed subscriber.
- Remove tag only removes existing tags. It has no effect if the subscriber does not have the tag.
- Removing a topic tag is not a global unsubscribe. Use that tag in your audience targeting to stop emails for that topic.
- You can combine tag action links with conditional content (
showIf) to show different choices to different segments.
Best Practices
Before sending, test the complete click path and check the success page and subscriber profile.
- Make the link text describe the result, such as Get AI updates or Stop promotional emails.
- Prefer one clear action per link and short, readable tag names (
interested-ai,promo,vip). - Reuse existing organization tags when possible to keep the editor menu easy to scan.
- Check that resubscribing is intended wherever you use an add-tag link.
Related Documentation
- Variables - Personalize email content and subject lines
- Workflows - Trigger sequences from tag changes
- Action Step - Add or remove tags inside a workflow
- Workflow Groups - Chain tag handoffs without overlapping enrollments
- Subscriber Events - Review tag add/remove history
- Tags API - Create and manage tags programmatically
- Add Tags to Subscriber - Add tags via API
- Remove Tags from Subscriber - Remove tags via API
- Content Deliverability - Keep campaign content inbox-ready